

Adding a New Client
From the left navigation menu, click Clients.
Click the + Add Client button.
Fill in your client details:
Company Name (required)
Logo (optional but looks great on reports!)
Contact Name [optional]
Contact Email [optional]
Click Save and you’re done! Your new client is ready to roll.
💡 Tip: Adding a logo now automatically applies it to all future reports for that client, one less thing to worry about later.
Create a New Report
From the left navigation menu, click New Reports → then click + New Report.
Fill in your report details:
Report Title (e.g. “Q4 Highlights” or “Launch Coverage”)
Select Client from your list
Start Date & End Date for the reporting period
Add your coverage links - you can do this two ways:
Paste links directly into the field
Upload a CSV file if you’re importing in bulk
Click Import Links and watch your coverage populate automatically.
💡 Tip: PR Coverage instantly pulls in article titles, outlets, and domain authority data so you can skip the manual copy-paste grind.
Review & Edit Your Coverage
Before your report is generated, it’s important to make sure your coverage data is complete and accurate. Sometimes, article titles, outlet names, or publish dates can’t be imported automatically due to paywalls, site structures, or throttled metadata.
When this happens, those items won’t appear correctly in your final report unless they’re filled in here.
This is the workspace where you:
Fix missing or incorrect article details
Add additional coverage links if needed
Decide the order placements appear in the report
Select standout coverage to highlight
Remove coverage that doesn’t belong
Think of this screen as your final quality check before generating a polished, client-ready report.
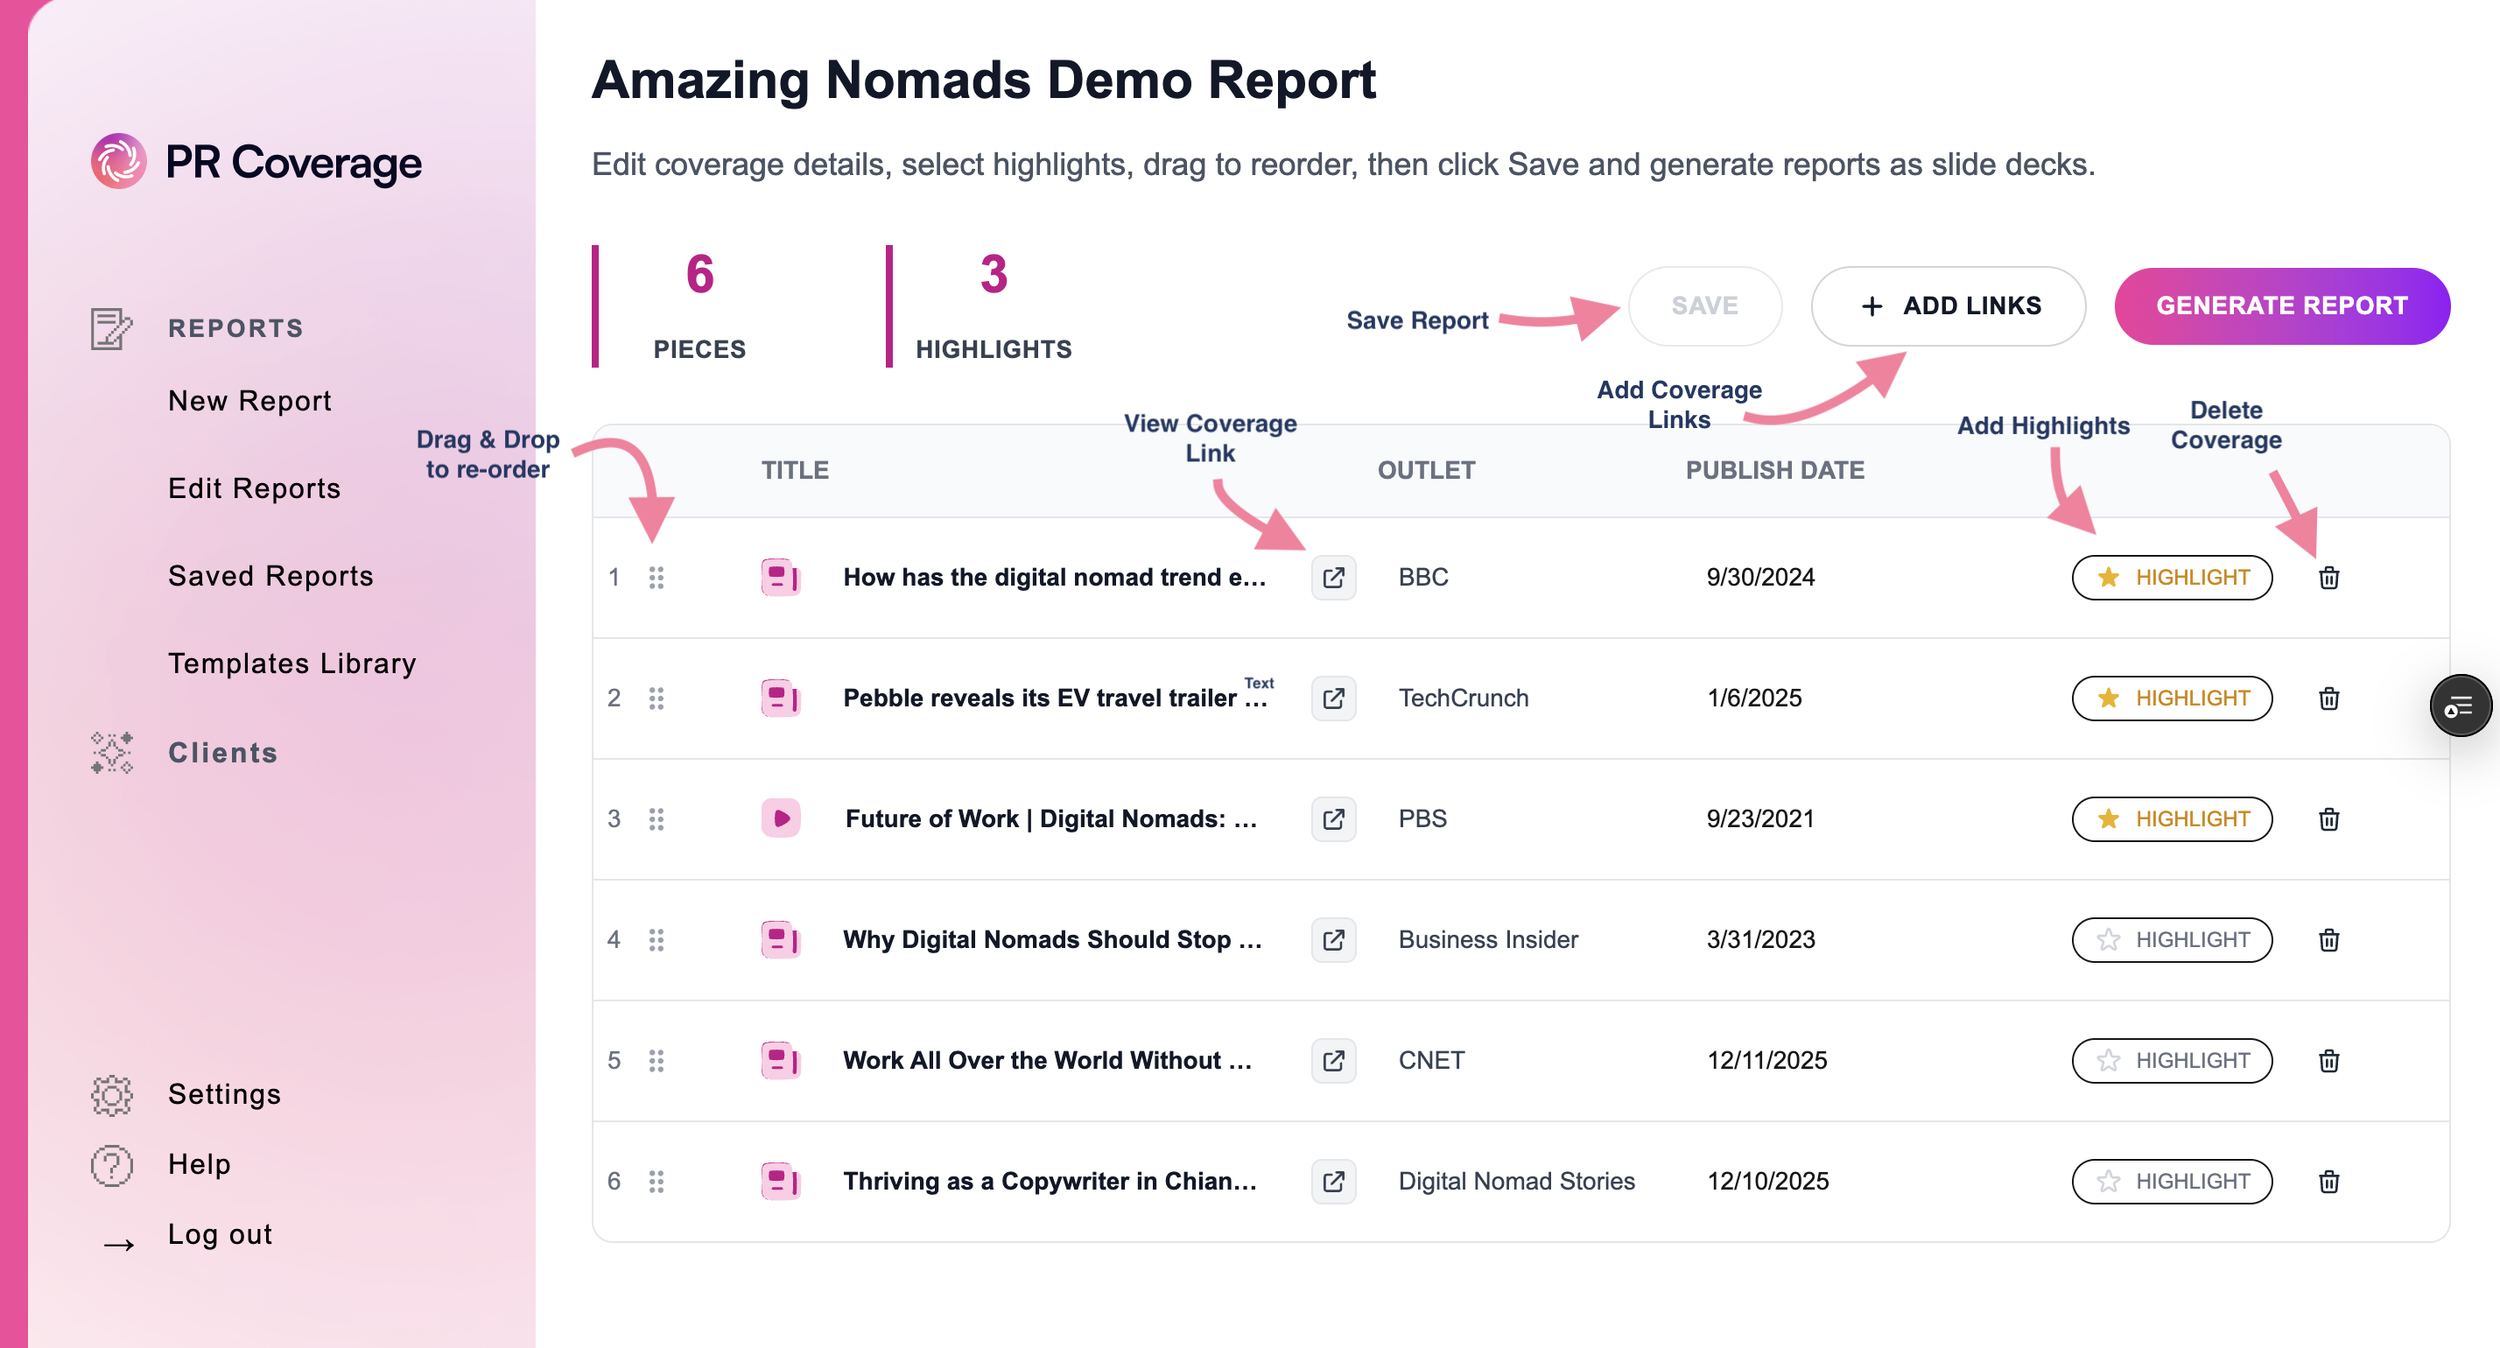
1. From the left navigation menu, click Reports → then click Edit Coverage on the report you want to update.
2. Inside the Coverage Editor, you can:
Edit missing or incorrect information - Update the Coverage Title, Outlet Name, or Publish Date directly.
Open the original article - Click the link-out icon to view the live URL. This is the easiest way to confirm or copy missing titles and publish dates.
Reorder coverage - Use the drag-and-drop handle to rearrange placements in the order you want them to appear in the report.
Add new coverage links - Paste additional links directly from this screen without leaving the editor.
Select Highlights (optional) - Click the Star icon to mark standout placements you want to spotlight.
Delete coverage - Use the trash icon to remove any placements you don’t want included.
What Are Highlights?
Highlights are your standout placements, the pieces you want to spotlight. They get their own dedicated slide in your report so clients can see the top hits at a glance.
How to Select Highlights
Click the Star icon beside any coverage item to mark it as a highlight.
3. Once you’re done editing, click Save to update your report.
💡 Tip: Use Highlights to turn a large coverage list into a more focused story, perfect for executive summaries or client presentations.
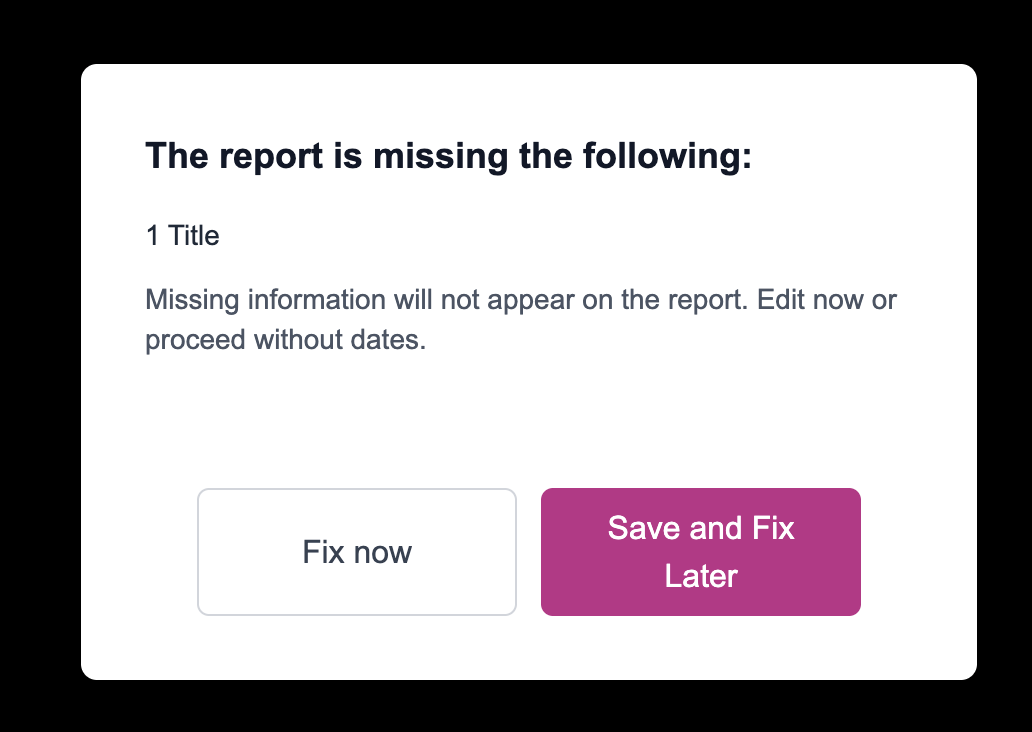
⚠️ Missing Info Alerts
If any required information is still missing when you’re ready to move forward, PRCoverage will show a pop-up alert letting you know exactly what needs to be fixed before generating the report.
Generate Your Report
1. Once you’ve finished reviewing and editing your coverage, click Generate Report (you’ll find this at the top-right of the same screen).
2. Choose your preferred Template.
3. Click Generate Report and let the magic happen.
Your report will be created automatically - sleek, branded, and ready to share.
💡 Tip: You can experiment with various templates anytime. Each has its own vibe, so pick the one that best matches your client’s brand personality.
Exporting & Sharing Your Reports
Once your report is generated, it automatically appears in the Saved Reports page, your personal library of finished work.
Here’s what you can do from this screen:
View & Edit Slides - Open your report in Google Slides, where you can make quick edits or add finishing touches before sharing.
Download as CSV - Export your coverage data for deeper analysis or backup.
Create PDF - Click this to generate a client-ready PDF version of your report. You’ll then see options to:
• View PDF - preview it right away
• Download PDF - save a copy to your deviceDelete Report - Need to clean things up? Remove older reports anytime with a single click.
💡 Tip: Once you’ve downloaded your final report, share it with your clients or team and celebrate your PR wins, you’ve earned it!

Reporting you’ll be proud to share
Stop sending clunky spreadsheets.
Start delivering reports that wow your clients and prove your impact.